Table of contents
TL;DR
Before submitting your iOS app to the App Store, you need to take care of technical and legal prerequisites. You should also learn the official App Store guidelines, and prepare resources such as Privacy Policy URL, app screenshots, promotional graphics, texts, test accounts, and more. Then, you will go through the publishing process. It consists of steps like creating a New App in App Store Connect, creating a Product Page, and submitting it for review.
Read on to understand the above steps in detail. Below the article, in the FAQ section, you will find answers to questions like
- How long does it take to publish an iOS app?
- How much does it cost to publish an iOS app on the App Store?
- How do I distribute an iOS app internally?
Introduction
The App Store is a platform to distribute iOS apps. It was developed by Apple and is the second-largest app store (after Google Play) with almost 1.96 million available apps. Whereas the exact number of apps may fluctuate as Apple and Google regularly remove low-quality content from their stores, the number of applications has been steadily increasing over the years.
With a focus on bringing the best experience for the end-user, the store ensures every app has the highest standards and brings something new. Apple wants their user to feel confident that the app they download is safe and will not break their phones. That is why:
- Users can choose whether or not to share data.
- Every week, over 500 experts review around 100k apps.
- There were over 150k app rejections last year for violating privacy guidelines and over 1M rejections for inadequate content.
- Every app has a page with detailed information, which an app owner must fill during the publishing process.
As you see, it’s important to prepare an attractive and informative Product Page, complete with all important information. It’s a crucial part of the entire app development process.
In our previous article, Publishing on App Stores, we described the process of app publishing in general – both on the App Store and Google Play. In this post, I will focus only on iOS and how to submit an app to the App Store. I will describe the most important aspects of iOS app publishing to make your review pass smoothly, without rejection.
You can also find out, how to publish an app on Google Play.
Read also: 10 Best AI Coding Assistant Tools in 2024– Guide for Developers
Before submitting your iOS app to the App Store
Check what important requirements you should know before you start publishing your application on the Apple App Store.
Take care of technical prerequisites
First, when talking about submitting your app to the App Store, we have to remember technical prerequisites.
1. Developer Account
In order to be able to submit apps to the App Store, you need to enroll in the Apple Developer Program. The annual cost of the account is $99. Besides the availability to publish the app, you get access to various benefits, such as access to the beta version of Apple software or testing tools like TestFlight.
2. App build uploaded to the App Store Connect
Before you send your app for review, you will need an app build. It has to be assigned to your developer account. The assignment can be made by your development team, which will create the proper certificate required by Apple on your Developer Account and sign the app build with it.
Keep in mind that, starting from April 2021, all iOS and iPadOS apps submitted to the App Store must be built with Xcode 12 and iOS 14 SDK.
Meet legal prerequisites
The iOS app you submit to the App Store has to comply with all legal requirements in any location where you make it available. A good example for EU/EEA countries is the well-known GDPR directives, which have been in effect since 25 May 2018.
Apple pays special attention to how user data is handled and if apps meet the Apple Developer Program License Agreement. The license describes the agreements for data collection and storage, data usage and sharing, health research data protection, and collecting data from kids.
Also, your app should only include the content that you created or that you have a license to use. In cases regarding using someone else’s content without proper rights, the app can be removed from the store.
Read also: 5 Key Legal Issues to Consider in your Mobile App Development
Learn the official guidelines
Apple pays special attention to the quality of the apps and detailed app information visible on the Product Page in the App Store. They created their own guidelines about all aspects related to the app publishing process. This article focuses on the publishing steps that are required. Optional ones are described briefly.
Publishing process on the App Store
1. Create a New App in App Store Connect
The whole process starts in App Store Connect where you can open My Apps and tap the plus button in order to create a new app.

When creating a new app, you will be asked to fill in the following basic information:
- Platforms – here, you specify which Apple platforms your app supports.
- Name – up to 30 characters. This is the main app name that the user will see in the App Store (pic.1).
- Primary Language – the main language for the app’s information. In case of missing translations for a specific language, the primary language will be used.
- Bundle ID – here you can select from the app identifiers that are registered in the Developer Account (this value is unique for every app on the App Store). If the app build is ready, make sure you choose the same ID that was used in the Xcode during app archiving.
- SKU – stands for [Stock Keeping Unit]. This is an optional value. It could be helpful if you want to tie the app sales with whatever internal SKU number that your accounting is using.
- User access – specify if your app should be accessible to all members in your App Store Connect organization or to specific groups or people.
Filling all the required fields and tapping the ‘Create’ button will redirect you to the Product Page.
2. Create a Product Page
In the Product Page, you provide detailed information about the app. This information will be visible to the App Store’s users. Here, you have the opportunity to encourage them to download your app by putting in well-crafted metadata.
The Product Page contains a few tabs – iOS App, General, and In-App Purchases. DOPISAC
iOS App / Version Information
In this part, you can enter information about the current version of the app, regardless of whether it is the first version or an update.
The section contains:
- App previews – an optional short video that demonstrates the core app features. It can be up to 30 seconds long and you can put up to 3 app previews.
The app preview can be localized.
- App screenshots – up to 10 screenshots of your app. Select the features that will visualize your app UX the best way. The first two screenshots (if there is no app preview) are shown in search results, which is why they are very important because they are one of the first things the user sees. The App Store requires some screen sizes to be uploaded (it changes with the new iPhone releases). Find the current requirements here. Screenshots similar to app previews can be different for each supported language.

- Promotional Text – an optional field. It could be changed without a need to upload a new app version. It helps if you need to inform users about a feature you forgot to mention in the description.
- Description – a place to put detailed information about app features.
- Keywords – put some keywords here to make your app more searchable in the App Store.
- Support URL – the URL where users can get help. This is a required field.
It is good if you have a website, then you can put a proper link here. The same is with other URLs required by Apple.
If you do not have a website, you can create a Facebook page for your app and put all information there or use one of many free website creators. One of the most popular is WIX, for example. - Marketing URL – the URL where users can find marketing information about the app.

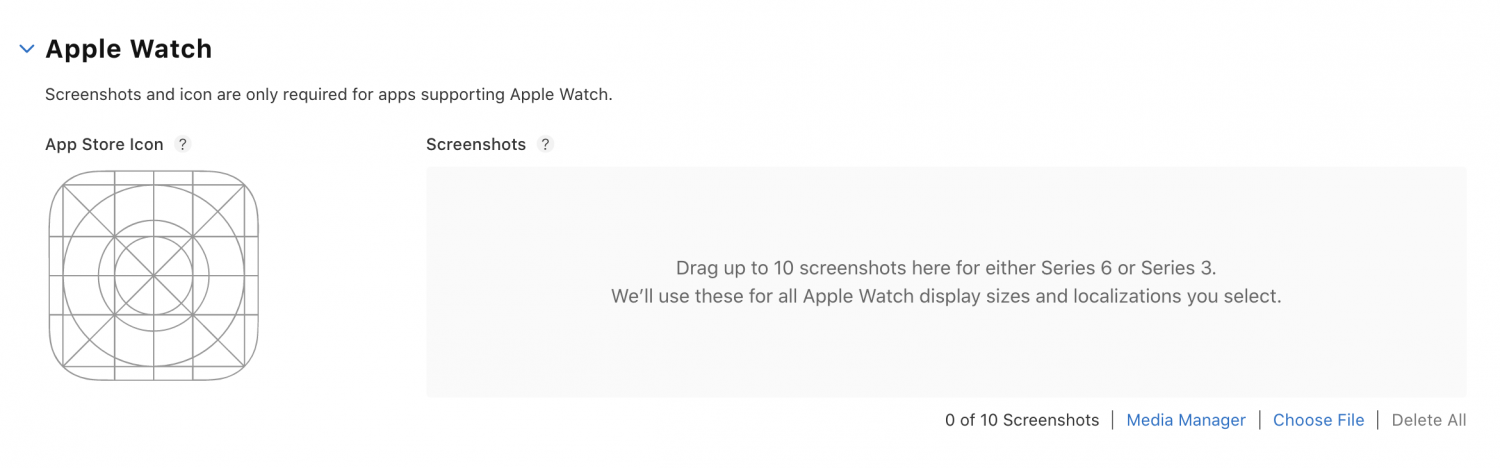
iOS App /App Clip, iMessage App, Apple Watch
Next, you will be asked to fill in sections on App Clip, iMessage App, and Apple Watch. You only have to do this if your app supports these features.
The Apple Watch section requires uploading up to 10 screenshots of the watch version of the app. The screenshots could be localized. App Store Icon is automatically fetched from the uploaded app build.
The iMessage App section also requires uploading up to ten screenshots of the app that uses the Messages framework (an extension that allows users to send text, stickers, media files, and interactive messages).

The App Clip section is for the apps that allow users to access a small part of the app to be available through a safari browser without a need to install the app. It is a quite new and promising feature introduced by Apple. In this section, you have to fill in the subtitle that best describes your clip, an action label that appears on the app clip card, and a header image that appears on the app clip card when the experience is invoked from Safari or Messages. If you are interested in App Clips you can read more here.

iOS App / Build
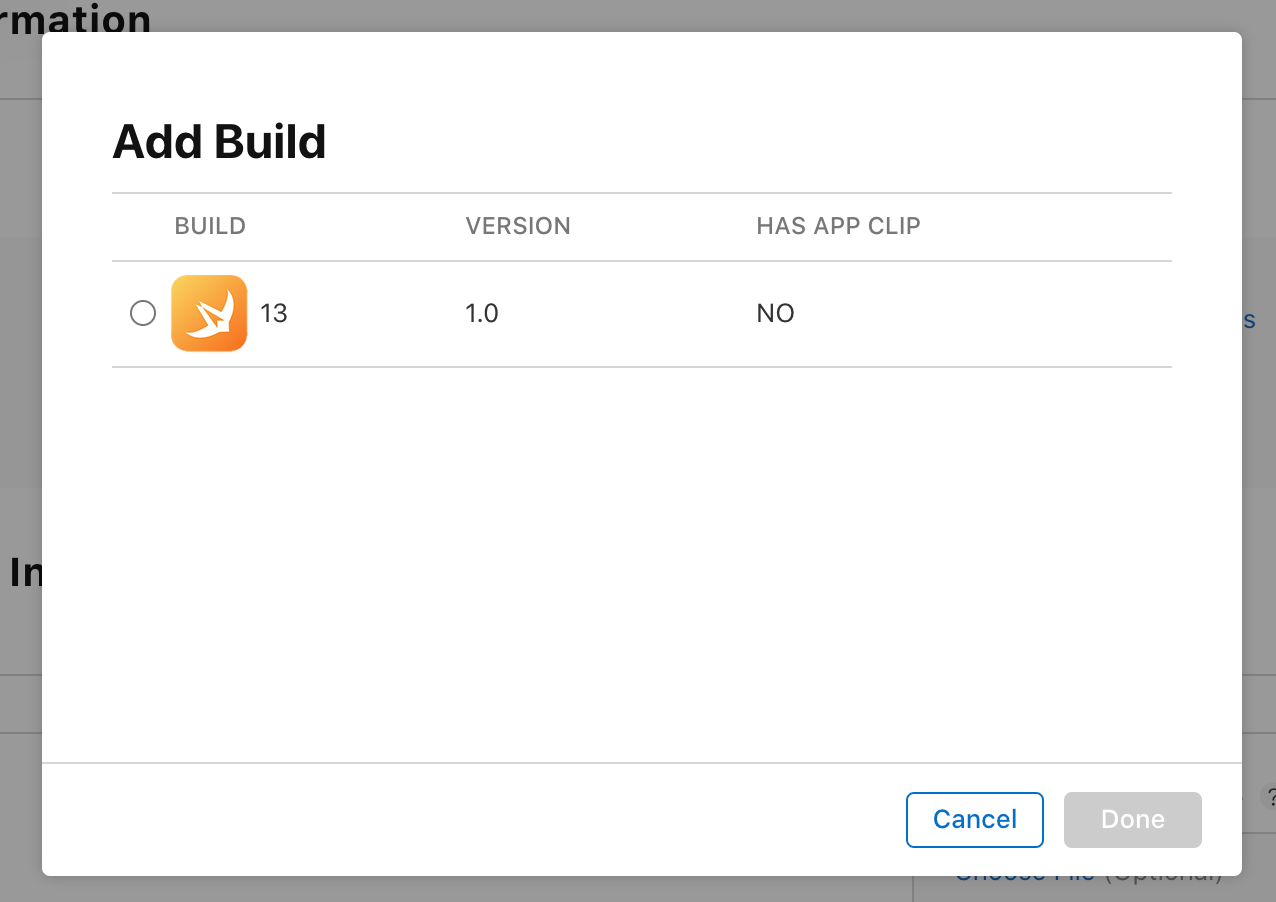
This section can have three states.
The first is for when you do not upload the app build. It will just show a message to upload it. In case you have already uploaded a build, you will see a button to choose the specific build.

Tapping on it will show a dialog with a list of available app builds.
When you select the build, there may appear a second dialog box asking if your app uses encryption. Choose the answer that fits your app’s functionality.

When the app build is selected, the section goes to the third state, where you will see selected build information.

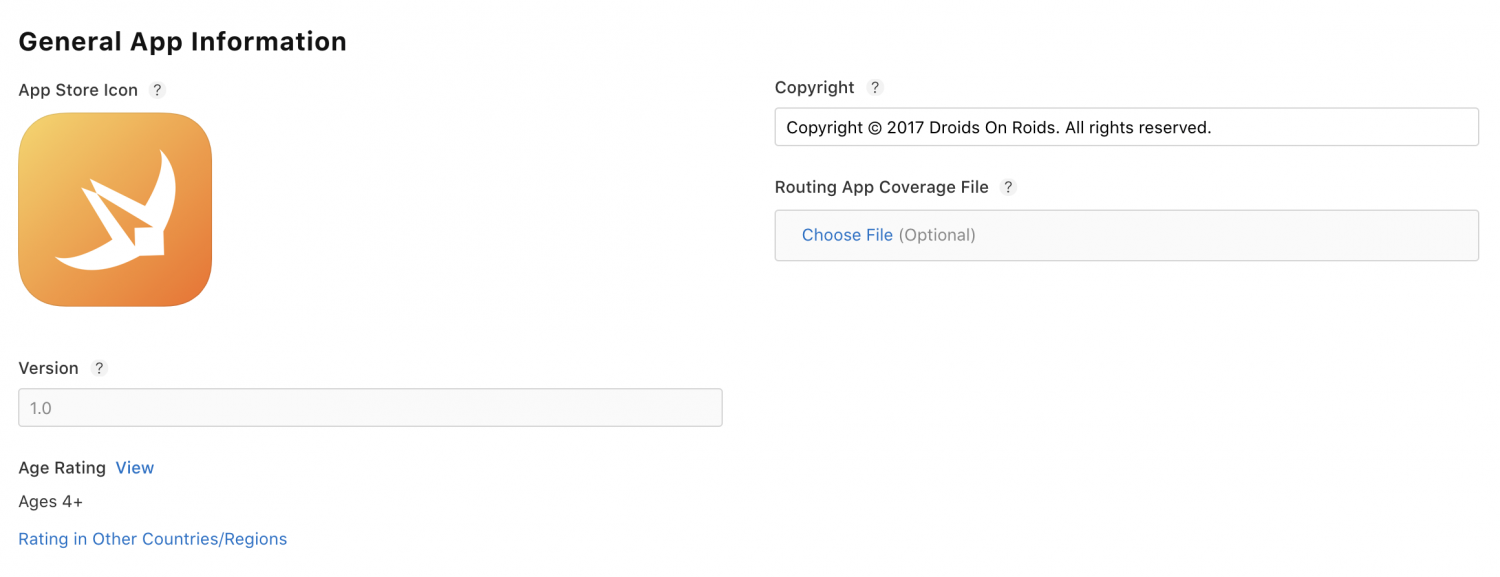
iOS App / General App Information
- The App Store Icon is pulled from the selected app build. This icon will be visible in the App Store.
- Version – the version of the app. This should be higher than the previously given value (only during app update). Versioning should follow software versioning conventions.
- Age Rating – the form where Apple asks about the frequency in which specific content occurs in the app. Mostly, the questions will be about adult content such as violence, nudity etc. Depending on the answers, Apple will assign an age group that is able to use the app.
- Copyright – here you can put the name of the entity or person that owns the rights to your app. You can see an example of this on the attached screenshot.
- Routing App Coverage File – here, you can specify a specific geographic region your app supports. It should be a file with
.geojson extension. For an example of such a file, you can check here. It is fully optional and you do not need to put the file if there is no need to.
iOS App / App Review Information
Additional information for Apple’s reviewer for testing purposes.

Every new app, or a new version of an existing app, is tested by a real person from Apple. In this section, you can specify test credentials to allow the tester to log in to the app (if such functionality is implemented) and fill in Contact Information in case Apple would want to ask something.
Additionally, you can add notes for the reviewer and an attachment (this could be a video file showing how the app works – helpful if your app connects with a Bluetooth device and you do not have the possibility to send the device to Apple).
iOS App / Version Release
Choose how the app should be released. There are three options:
- Manually – by clicking the ‘Release’ button,
- Automatically – just after the positive review,
- Automatically with date restriction – choose the date when the app should be released.

General / App Information
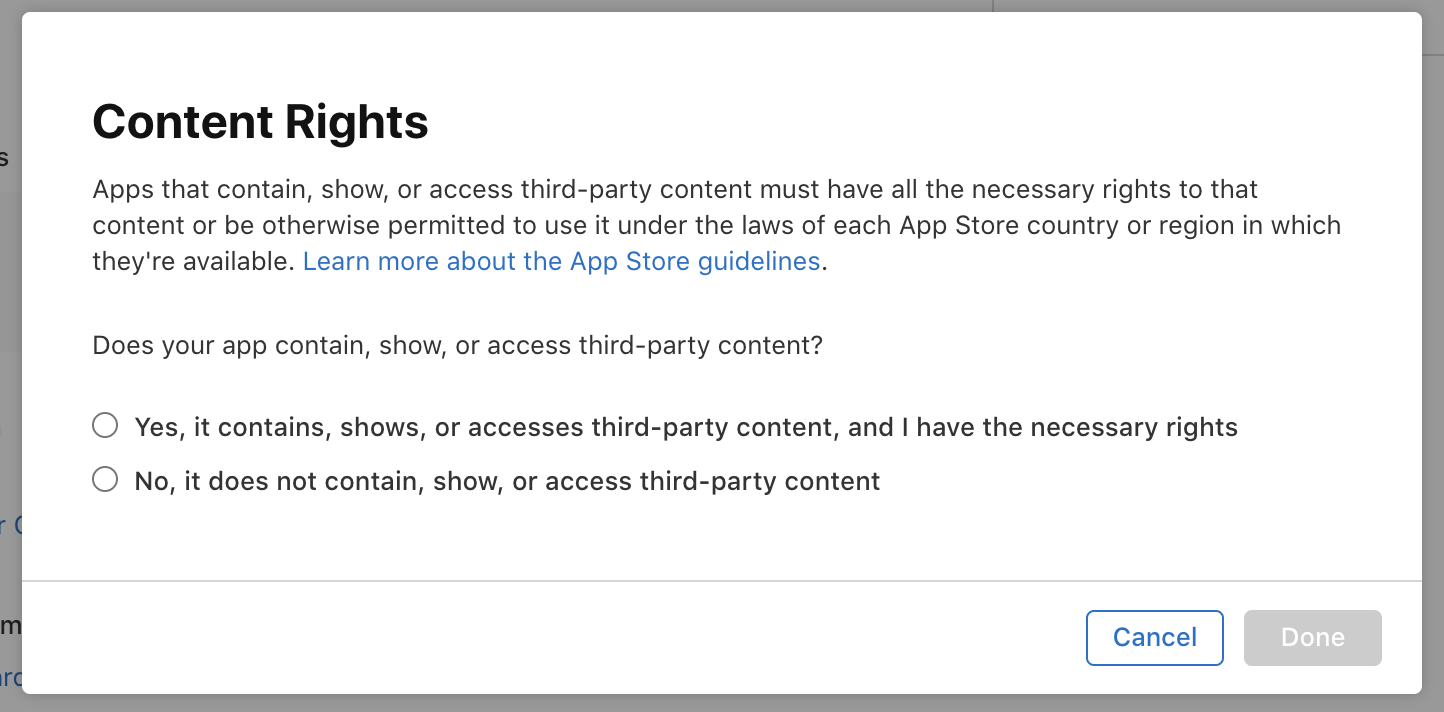
The second tab contains the app information filled during the app creation, as well as a subtitle for the app and a place to choose the app category.
One additional required information here is about Content Rights. If your app contains, shows, or accesses content from some third-party source, you have to have the necessary right to use it.
General / Specify Pricing and Availability
Price Schedule
In this section, you can specify the price for your app. The price determines how much the user has to pay in order to download your app. Your proceeds will be the price paid by the user minus Apple’s commission and taxes.
Apple announced that, starting in January 2021, they lowered their commission to 15% for developers who earn less than $1 million a year. Before, it was 30%.
Additionally, you can specify the app price for a specific time period. It is useful if you want to make your app cheaper at the beginning to encourage users to download it
Availability
This section allows you to specify the countries and regions in which the app will be available. By default, all countries are selected. Careful selection can be useful here if your app contains content that is not permitted by the law in some countries, such as gambling games, or you just built an MVP of your app and want to start in just one country to check how the application will be adopted.
If you are not familiar with the MVP definition, you can read more about it here.
iPhone and iPad Apps on Apple Silicon Macs
This is a quite new feature. Apple allows users to run iPhone and iPad apps on their newest silicon Macs with M1 chip and MacOS Big Sur. You can read more about it on Apple’s site. In this section, you can specify if you want your app to be installable on Macs.
General / App Privacy
App Privacy is the fourth tab.
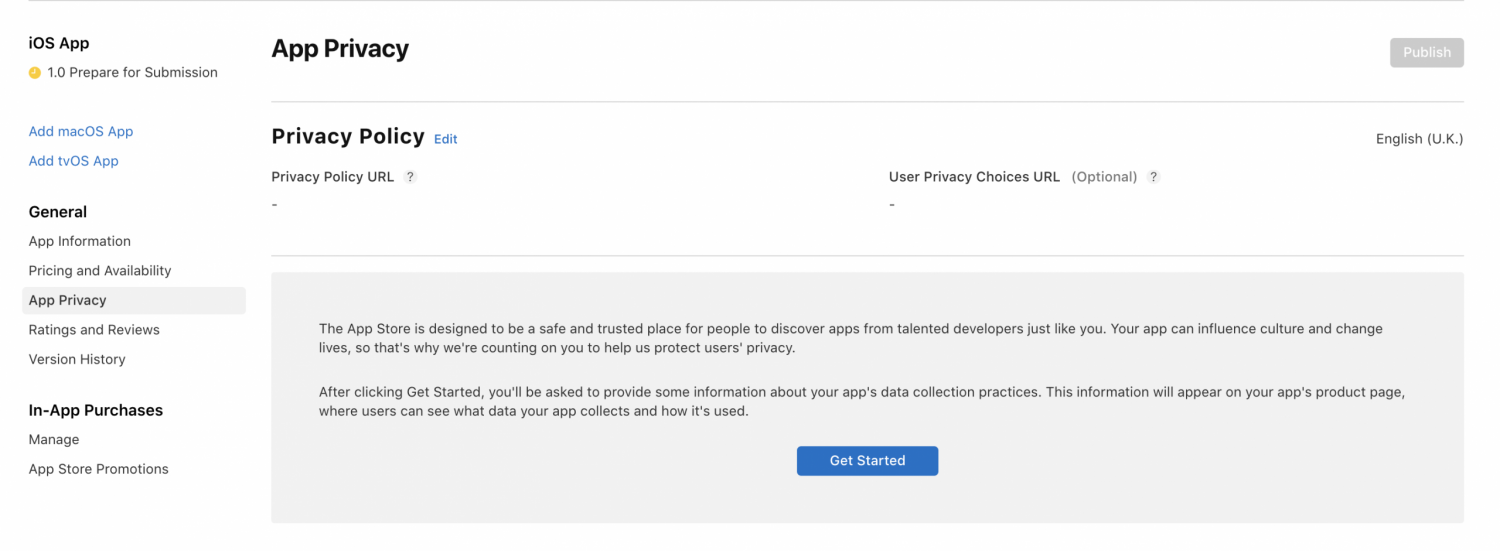
Here, you are obligated to put the URL of your app’s Privacy Policy. As an additional option, you can put the URL to the privacy choices where users can modify which data the app collects.
Lately, Apple has added App Privacy Details on the App Store.
It helps users to learn what kind of their data the app collects and if this data is linked or used to track them before they download the app.
What does this mean to you as an App Owner? Well, you need to fill a form that specifies the kind of data that the app collects and how the data is used.
The form is a simple list of data that could be stored and a check box next to each.
When you select the proper options and tap “Save” you will see your selection under the ‘Data Types’ section and, for each type, a rectangle with a button to set up data.

Tapping on a ‘Set Up’ button will take you to the next form, where you need to specify how the selected data collected from your app is used by you or your third-party partners. Also, in the next steps of the form, you will be asked if the data collected from this app is linked to the user’s identity and if the data is used for tracking purposes.
When you finish, you will see your answer in the rectangle next to the proper data type, as well as the Product Page Preview section, dividing the data to three section:
- Data Used to Track You
- Data Linked to You
- Data Not Linked to You
All of the data about privacy can be edited any time something changes in your app.
In-App Purchases
If your app will allow users to buy virtual products like points, access to features, or other content, it is a place where you can define all of them.
There are four types of In-App Purchases:
- Consumable
- Non-Consumable
- Auto-Renewable Subscription
- Non-Renewing Subscription
If you are interested in adding In-App Purchases to your app, visit this Apple website to get more information about it and a detailed explanation of how to implement it.
3. Submit for Review
When all the metadata is ready, you can click the “Submit for Review” button. You can find it in the “iOS App/Prepare for Submission” section. You can be also asked to answer the Export Compliance, Content Rights, and Advertising Identifier questions.

After that, your app status is “Waiting for Review”.
4. Go live!
Right now, it is time to wait for Apple’s specialist to test the app and grant approval. You can check the actual status of the review in the General / Version history tab.
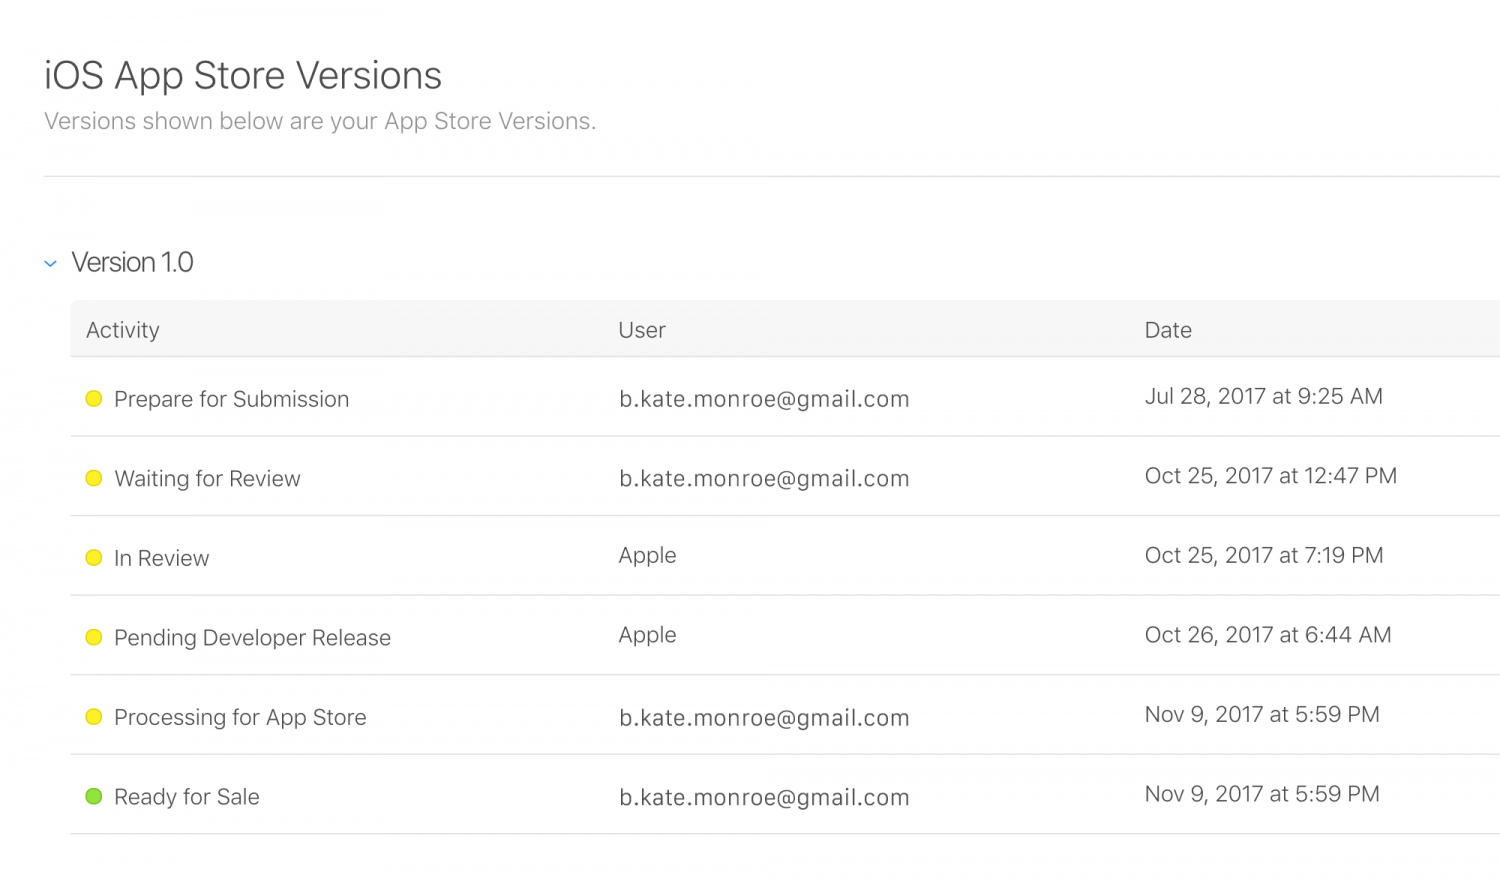
The review process duration could take anywhere from a few days up to two weeks. It is different for each app. Apple states that around 50% of apps are reviewed in 24 hours and over 90% are reviewed in 48 hours.
It could happen that your app is rejected for some reason. You will be notified about it by email. In the App Store Connect, you will see information about the rejection with the option to go to the Resolution Center and check the details.
You have to fix the problem, build a new app, and send it for review.
In the Resolution Center, you can ask a question if something is unclear to you. Also, if you think that the app was wrongly rejected, you can submit for appeal.
If your app is approved its status will be `Ready for Sale` unless you have selected manual release, in which case you have to click Release. The app will be visible in the App Store in a few hours since being released.
Now, when your app is on the App Store, you can monitor it by opening the Analytics tab.
You will have insights into the number of users, session times, sales, crashes, etc.
It is also important to fix bugs and make app updates regularly.

Metadata filled in the Product Page – where is it displayed?
The Product Page is very important, as it contains data that is visible for the end-user and could be the decision point in whether to download the app or not. In this video from Apple, you can find some tips on how to build a Product Page to encourage users to download your app.
Below, you can find where specific metadata from a Product Page is displayed on the App Store. As an example, I used our LetSwift app:


Summary
The app publishing process may seem complicated at the beginning but, with this article, we hope that we’ve shown you that it is not as hard as it seems. The key to making the publishing process quick is to prepare the needed resources, such as the Privacy Policy URL, app screenshots, promotional graphics, texts, and test accounts, in advance.
I hope this article will help you with publishing your iOS app on the App Store. Happy publishing!