Table of contents
In the previous article – Practical Fragment Shaders in Flutter | Guide – Introduction, you learned about the history of fragment shaders in Flutter and the basics of creating your very own custom shaders. You learned the theoretical advantages of using conventional widgets over other drawing methods. Yet, the only example of a shader you’ve seen was a red rectangle. It’s time to change that and prove how much of an improvement shaders can be.
But in order to improve anything, we need to find something that needs improving first. And what’s the first thing that comes to mind, when we’re talking about graphics? Art of course! In our case, Generative Art, specifically.
For more information about Flutter, check out our other content:
Generative what?
As the word suggests, we’ll be generating stuff. Maybe to make things more clear, I should mention generative art’s alternative name – algorithmic art.
In the general sense of what art is, you could think of some art piece, like a painting or a movie, that is created by a human (or AI, for that matter) at one point in time and then displayed somewhere for others to see. And we’ll not be doing that. At least not directly. We’ll be creating an algorithm that will create that art for us. So, instead of creating a single art piece, we’ll write some code that, when run, will be able to generate infinite variants of beautiful graphics based on the parameters we set. Don’t worry if you’re not a very artistic person, we’ll be using math instead of a brush and a canvas.
Math? But math is hard!
As you’ve learned in the previous article, the colors that we see on screen are represented by a bunch of numbers stuck together. And there’s no better tool to work with numbers than math.
Don’t worry if you’re not very confident in your math skills – we won’t be using any advanced math concepts, so if you understand multiplication and division, you’re good to go.
The OpenGL Shading Language (GLSL) comes with a lot of handy math functions built in. We’ll go through some of them in a moment, but we need one more thing before we start.
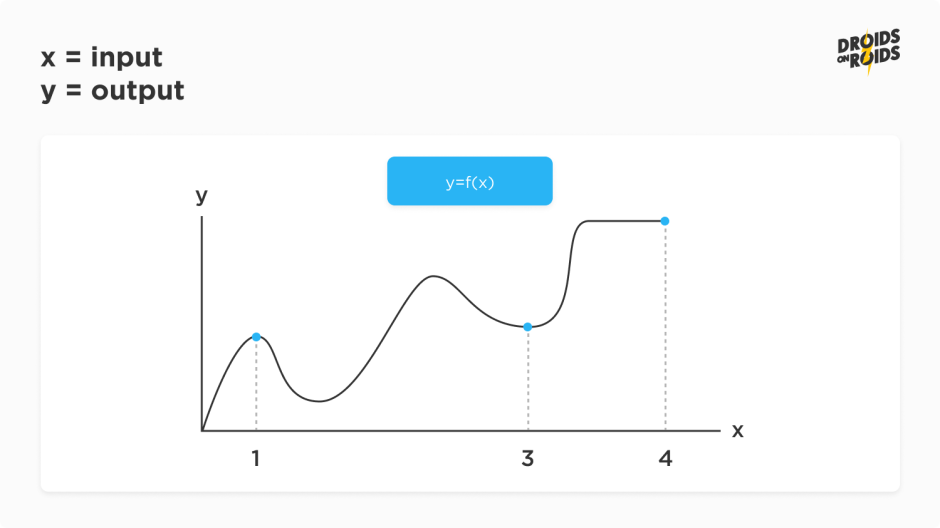
See, a mathematical function is basically a black box that takes inputs and, for each input given, returns us an output. So we need some input value and then a place to put the output value.
Let’s look at the shader we created previously and see if we can identify the problem:
Did you find it?
We have the output variable, so obviously, that’s where we put the output of a function, but how do we get an input? Without some input, all we can do is show the same output for all executions of the shader. And that’s what’s going on in the code above – we provide a constant input of numbers representing the color red for each pixel.
So what kind of input do we need, then, to make things more interesting?
Let’s start with the information about where on the screen we are currently drawing. To get that information, we’ll utilize a handy API that Flutter provides for us – `FlutterFragCoord`.
As you can see, to use it, we first need to add an `include` line, and load the `flutter/runtime_effect.glsl` library, which contains the `FlutterFragCoord` API. We call it and extract the current coordinates by calling the `xy` getter. Let’s run it and see what happens.

Oops, seems like something went wrong.
Everything is normal(ized)
We’ve put the x coordinate into the red channel and y coordinate into the green channel. So the expectation was that the further we get in the horizontal direction, the more red we get. And the same goes for vertical and green. So why did we get just a static color?
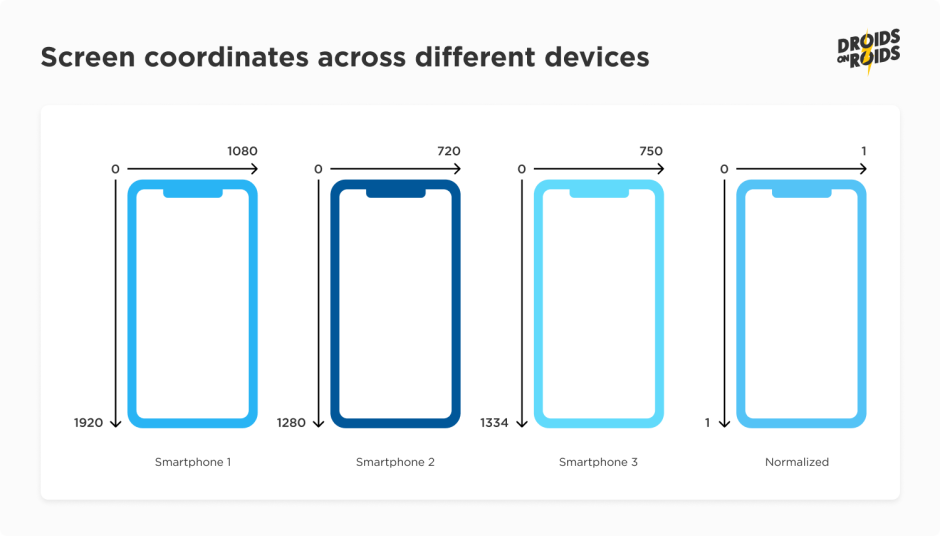
The answer’s simple – normalization. In the introduction article, I briefly mentioned that, when writing shaders, we’ll usually want to work with normalized numbers; meaning we keep our values capped between 0 and 1. Needless to say, the coordinates of pixels in an image are not very likely to be in that range. And the maximum values of the coordinates are very likely to be different on every other device, because screen resolutions are different.
How do we normalize the coordinates?
We’ll divide them by the canvas’ resolution. And to get that resolution, we need to read it in Flutter and then pass it to a shader. For that, we’ll use the `size` object provided in the `paint` method and shader’s `setFloat` method.
And now, to handle those values inside the shader:
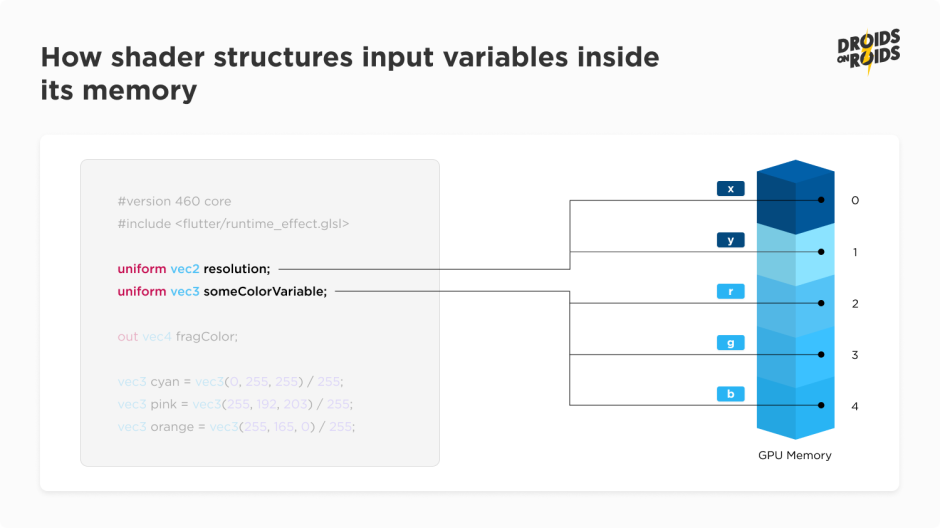
We create a `vec2` variable for the resolution and use it for the division when reading the fragment coordinates. There’s also a new `uniform` keyword, which serves as an optimization of sorts. This essentially tells the compiler that the value of that variable will be the same for every concurrently running instance of the shader. That allows the GPU to save memory by reusing the same value, instead of creating copies of it.
You might be noticing something weird going on here. After all, we have two `setFloat` calls in our dart code, but only one new variable in the shader. Does the FragmentShader API just know where to assign which values? Well, It doesn’t. That’s where those numbers we put in the first parameter come in. The memory for our variables inside the shader can be visualized as just a bunch of boxes put in a sequence, with each box containing one number. Since our `vec2 resolution` is a structure of two numbers, the compiler knows it needs to reserve two such boxes for that variable. And it organizes two boxes in the order they are declared. That’s why we need to use 0 and 1 to put the values in the correct memory cells.
If we had another variable, let’s say a `vec3` this time, declared after the resolution variable, we would use indices 2, 3 and 4 to assign its values. Unfortunately, we need to keep track of those numbers ourselves, because Flutter will not tell us which index maps to which value in the shader. So be very careful with moving the input variables around and remember that, when you change something on the shader side, you’ll also need a matching change on the Flutter side.
Anyway, let’s run the code.
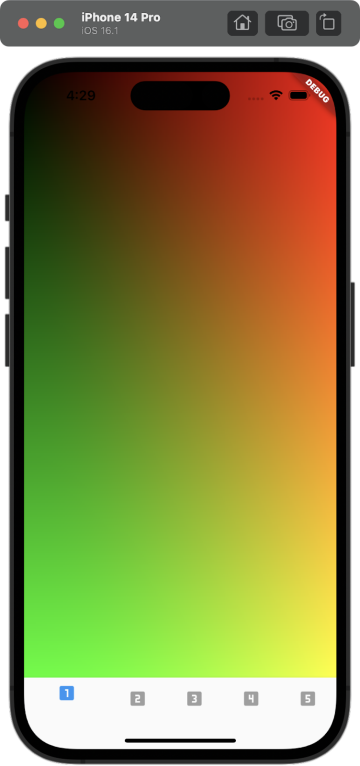
Success! We’ve got ourselves a beautiful gradient. And we’re just getting started!
Crunching the numbers
Let’s get back to those math functions built into GLSL I was talking about earlier. First up is some trigonometry! As you might remember from school, `sin()` and `cos()` are quite interesting functions that have a cyclical nature – which means that every now and then the output value will oscillate between -1 and 1. That property will allow us to create some really cool effects!
As a small reminder of how to handle trigonometric functions, let me also mention that trigonometric functions are designed to take inputs in radians – a unit that’s based on an angle of an arc (basically a pizza-slice like part of a circle). Because of that, to get predictable results, we should always scale our input variables (pixel coordinates in this case) by the PI number.
One more thing to remember is that `sin()` and `cos()` output values range between -1 and 1, so we should normalize them to stick to the 0-1 range.
Let’s apply all that knowledge to our code:
Note the `SCALE_FACTOR` constant. Thanks to working with a normalized set of coordinates that are additionally converted to radians, before being put into the `cos()` function, we can control how many cycles of the functions we want to show on screen. For a `SCALE_FACTOR` of 8, we should see exactly 8 stripes drawn on screen.
Let’s see if we’re correct!

We’re right! 4 red stripes and 4 black ones.
Now do the same for green and blue channels, only let’s make the green stripes horizontal and the blue ones diagonal:
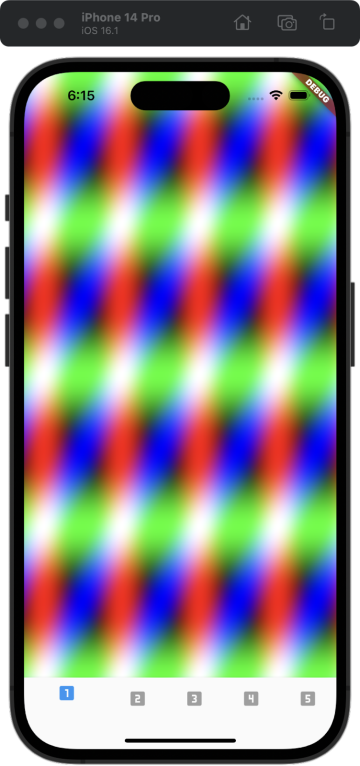
Looking good!
Mixing it up
Up until now, we were using values we calculated for specific directions of stripes as values for a separate channel in our output color. But what if we want to combine the outputs of more than 3 functions? And what if we want the functions to have different colors than just red, green and blue?
`mix()` comes to the rescue! It’s a function that… well, mixes two colors together (or any numbers that you pass as the input). Its first two parameters are the vectors you want to mix, and the third parameter – named `a` – represents the mix percentage. This means that, if you set it to 0.3, for example, it will take 30% of the first vector and 70% of the other one.
Let’s rename our `stripe` variables to describe directions instead of colors, and use `mix()`, to mix their colors together.
And the result:
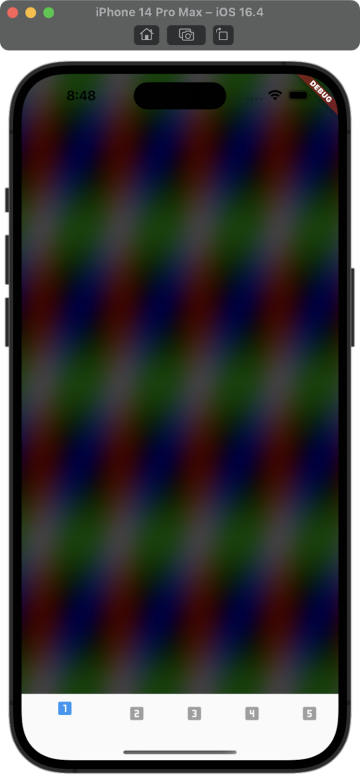
Something’s off! The screen seems so dark now! That’s because what `mix()` does is essentially linear interpolation between the colors we provide. What this means is that it takes half of the intensity of each color and adds them together. Hence the lost brightness.
So what do we do? There’s no easy answer to that question. If you google “color blending algorithms”, you’ll learn there’s tons of approaches, each with its own levels of complexity and drawbacks. The best advice I can give is to experiment. Try some stuff out and see what works for the effects you’re trying to achieve!
For example, you could try adding the colors together, multiplying them, using `max()` to pick the brightest of the three colors for each pixel, or just play around with other functions like `smoothstep()`. The possibilities are limited only by your creativity!
For our final trick, let’s try to display different functions in different areas of the screen. And we’ll use the same `mix()` function we used for mixing color values, to achieve that. Since we’ve normalized our pixel coordinates to be contained within 0-1 range, they’re the perfect candidate for the `a` parameter of the `mix()` function. Let’s try that and see what happens:
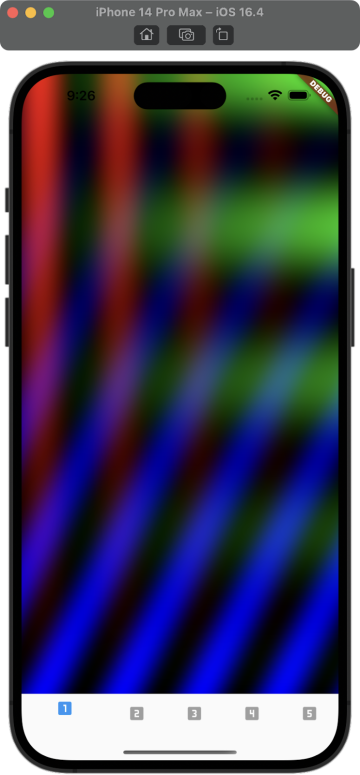
As you can see, the vertical and horizontal stripes are mixed using the `x` coordinate, so they’re blended along the horizontal axis, and then we mix in the diagonal stripes using the y position, so they take the bottom half of the screen.
Play around with it!
You’ve now got some basic math skills to create some neat effects using fragment shaders in Flutter. Before we proceed, I highly encourage you to try playing with what we’ve got right now – see how different parameters impact the outcome, try changing the functions we used, and just have some fun with it!
Once you get more comfortable with using math for drawing graphics, we’ll take it up a level, where the GPU performance gains will really come into play.
Find the next parts here:
Until then, as usual, feel free to ask any questions and take a look at my GitHub repository containing the code described in this article.